
- Download Price:
- Free
- Size:
- 0.1 MB
- Operating Systems:
- Directory:
- N
- Downloads:
- 703 times.
What is Noise.dll?
The Noise.dll file is 0.1 MB. The download links for this file are clean and no user has given any negative feedback. From the time it was offered for download, it has been downloaded 703 times.
Table of Contents
- What is Noise.dll?
- Operating Systems That Can Use the Noise.dll File
- Guide to Download Noise.dll
- Methods for Solving Noise.dll
- Method 1: Installing the Noise.dll File to the Windows System Folder
- Method 2: Copying The Noise.dll File Into The Software File Folder
- Method 3: Doing a Clean Install of the software That Is Giving the Noise.dll Error
- Method 4: Solving the Noise.dll error with the Windows System File Checker
- Method 5: Fixing the Noise.dll Error by Manually Updating Windows
- Most Seen Noise.dll Errors
- Dll Files Related to Noise.dll
Operating Systems That Can Use the Noise.dll File
Guide to Download Noise.dll
- Click on the green-colored "Download" button (The button marked in the picture below).
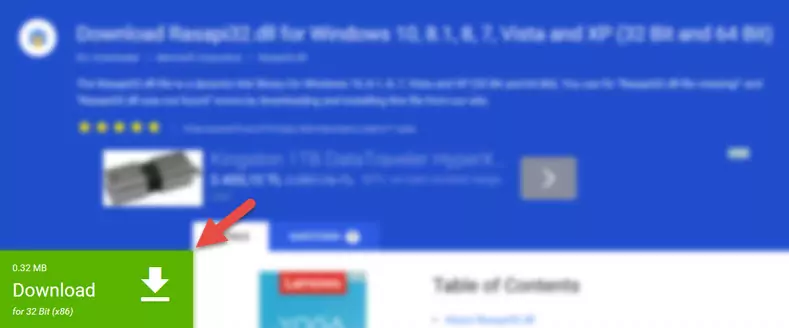
Step 1:Starting the download process for Noise.dll - "After clicking the Download" button, wait for the download process to begin in the "Downloading" page that opens up. Depending on your Internet speed, the download process will begin in approximately 4 -5 seconds.
Methods for Solving Noise.dll
ATTENTION! Before beginning the installation of the Noise.dll file, you must download the file. If you don't know how to download the file or if you are having a problem while downloading, you can look at our download guide a few lines above.
Method 1: Installing the Noise.dll File to the Windows System Folder
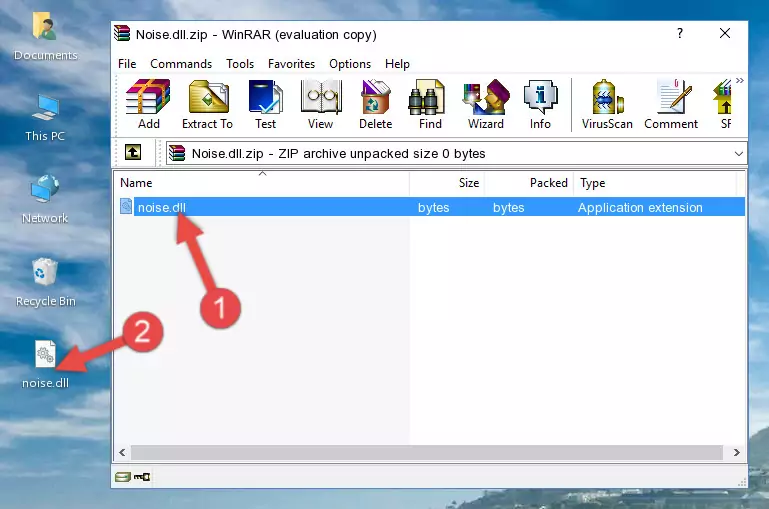
- The file you downloaded is a compressed file with the ".zip" extension. In order to install it, first, double-click the ".zip" file and open the file. You will see the file named "Noise.dll" in the window that opens up. This is the file you need to install. Drag this file to the desktop with your mouse's left button.
Step 1:Extracting the Noise.dll file - Copy the "Noise.dll" file file you extracted.
- Paste the dll file you copied into the "C:\Windows\System32" folder.
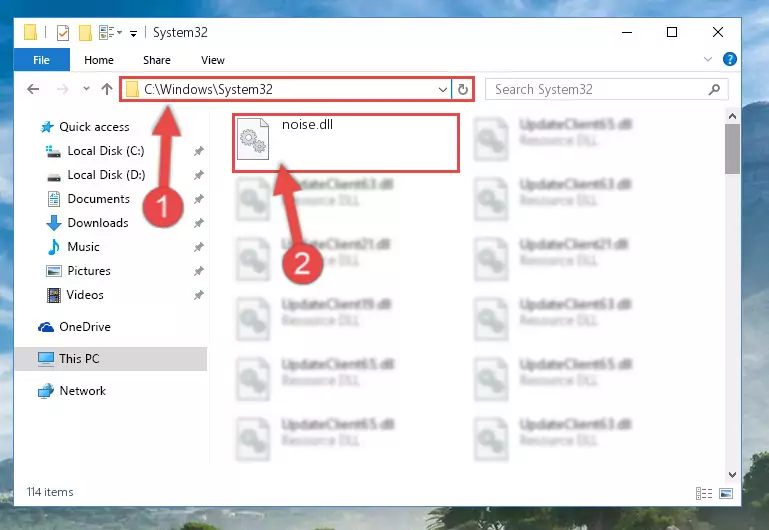
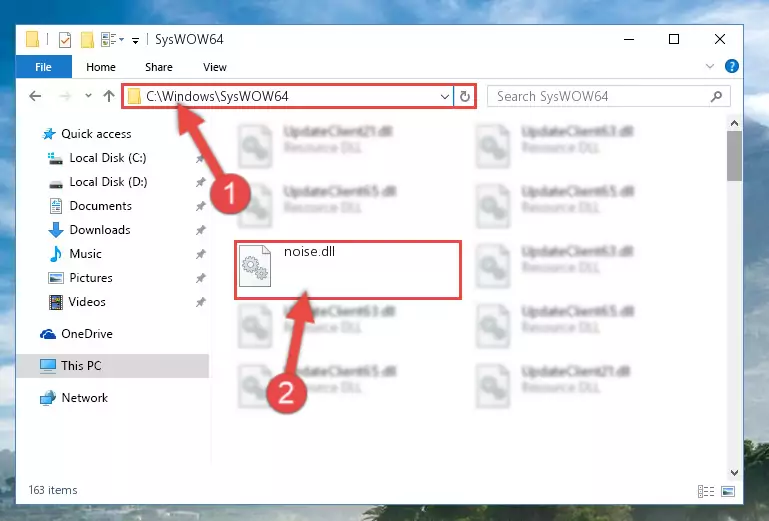
Step 3:Pasting the Noise.dll file into the Windows/System32 folder - If your system is 64 Bit, copy the "Noise.dll" file and paste it into "C:\Windows\sysWOW64" folder.
NOTE! On 64 Bit systems, you must copy the dll file to both the "sysWOW64" and "System32" folders. In other words, both folders need the "Noise.dll" file.
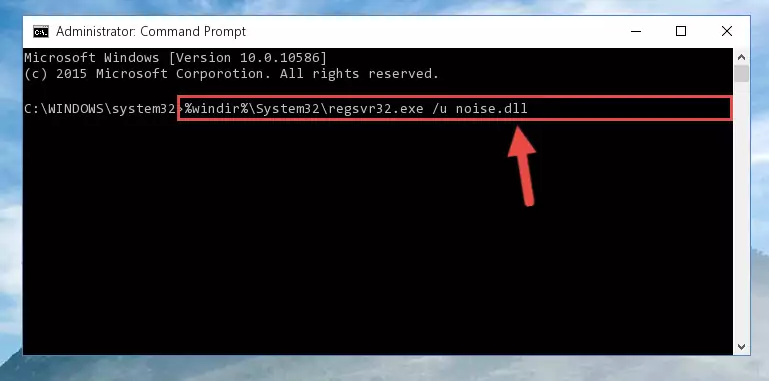
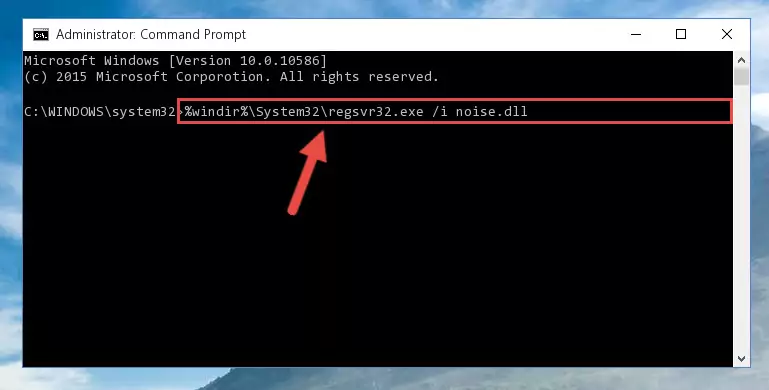
Step 4:Copying the Noise.dll file to the Windows/sysWOW64 folder - First, we must run the Windows Command Prompt as an administrator.
NOTE! We ran the Command Prompt on Windows 10. If you are using Windows 8.1, Windows 8, Windows 7, Windows Vista or Windows XP, you can use the same methods to run the Command Prompt as an administrator.
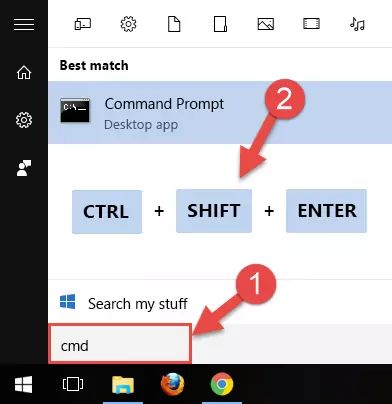
- Open the Start Menu and type in "cmd", but don't press Enter. Doing this, you will have run a search of your computer through the Start Menu. In other words, typing in "cmd" we did a search for the Command Prompt.
- When you see the "Command Prompt" option among the search results, push the "CTRL" + "SHIFT" + "ENTER " keys on your keyboard.
- A verification window will pop up asking, "Do you want to run the Command Prompt as with administrative permission?" Approve this action by saying, "Yes".
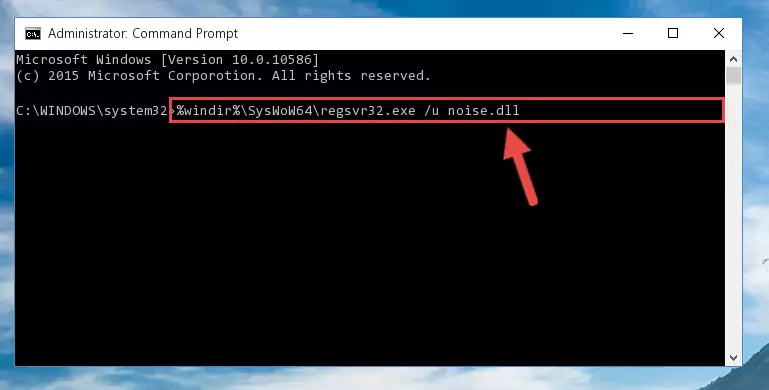
%windir%\System32\regsvr32.exe /u Noise.dll
%windir%\SysWoW64\regsvr32.exe /u Noise.dll
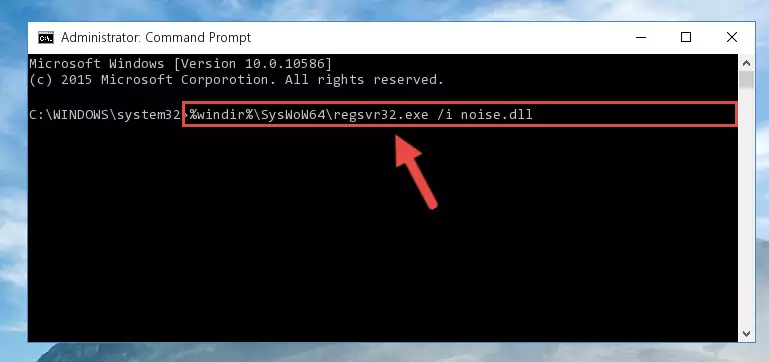
%windir%\System32\regsvr32.exe /i Noise.dll
%windir%\SysWoW64\regsvr32.exe /i Noise.dll
Method 2: Copying The Noise.dll File Into The Software File Folder
- In order to install the dll file, you need to find the file folder for the software that was giving you errors such as "Noise.dll is missing", "Noise.dll not found" or similar error messages. In order to do that, Right-click the software's shortcut and click the Properties item in the right-click menu that appears.
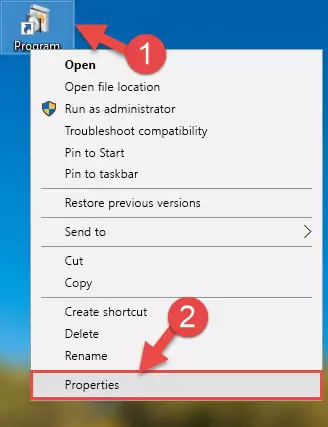
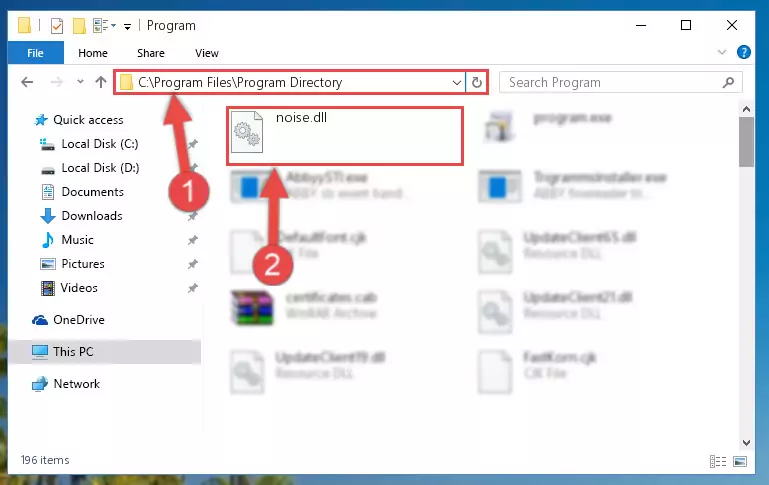
Step 1:Opening the software shortcut properties window - Click on the Open File Location button that is found in the Properties window that opens up and choose the folder where the application is installed.
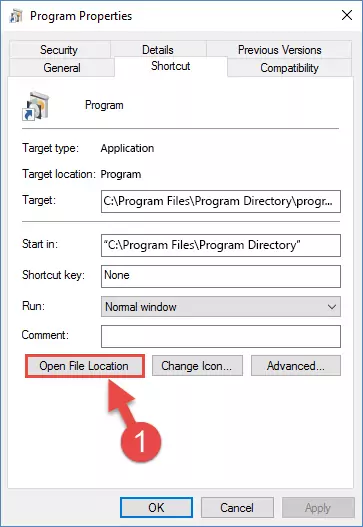
Step 2:Opening the file folder of the software - Copy the Noise.dll file.
- Paste the dll file you copied into the software's file folder that we just opened.
Step 3:Pasting the Noise.dll file into the software's file folder - When the dll file is moved to the software file folder, it means that the process is completed. Check to see if the problem was solved by running the software giving the error message again. If you are still receiving the error message, you can complete the 3rd Method as an alternative.
Method 3: Doing a Clean Install of the software That Is Giving the Noise.dll Error
- Push the "Windows" + "R" keys at the same time to open the Run window. Type the command below into the Run window that opens up and hit Enter. This process will open the "Programs and Features" window.
appwiz.cpl
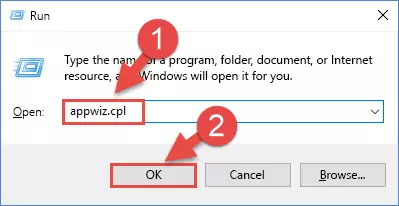
Step 1:Opening the Programs and Features window using the appwiz.cpl command - The Programs and Features screen will come up. You can see all the softwares installed on your computer in the list on this screen. Find the software giving you the dll error in the list and right-click it. Click the "Uninstall" item in the right-click menu that appears and begin the uninstall process.
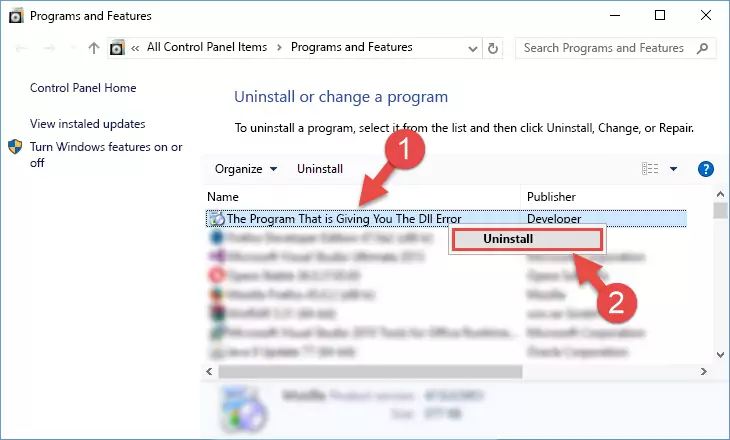
Step 2:Starting the uninstall process for the software that is giving the error - A window will open up asking whether to confirm or deny the uninstall process for the software. Confirm the process and wait for the uninstall process to finish. Restart your computer after the software has been uninstalled from your computer.

Step 3:Confirming the removal of the software - After restarting your computer, reinstall the software that was giving the error.
- You can solve the error you are expericing with this method. If the dll error is continuing in spite of the solution methods you are using, the source of the problem is the Windows operating system. In order to solve dll errors in Windows you will need to complete the 4th Method and the 5th Method in the list.
Method 4: Solving the Noise.dll error with the Windows System File Checker
- First, we must run the Windows Command Prompt as an administrator.
NOTE! We ran the Command Prompt on Windows 10. If you are using Windows 8.1, Windows 8, Windows 7, Windows Vista or Windows XP, you can use the same methods to run the Command Prompt as an administrator.
- Open the Start Menu and type in "cmd", but don't press Enter. Doing this, you will have run a search of your computer through the Start Menu. In other words, typing in "cmd" we did a search for the Command Prompt.
- When you see the "Command Prompt" option among the search results, push the "CTRL" + "SHIFT" + "ENTER " keys on your keyboard.
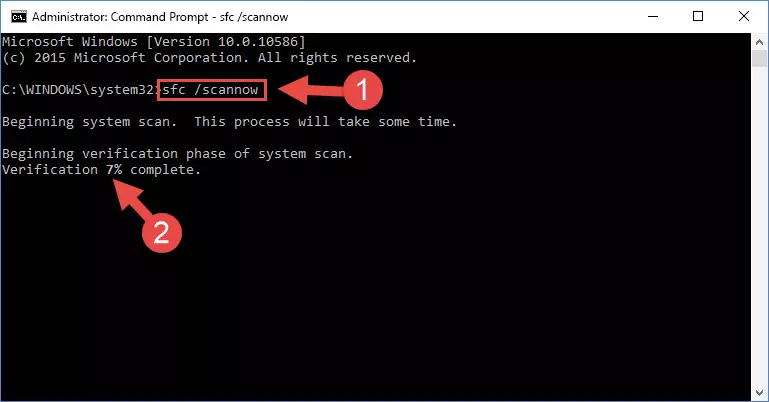
- A verification window will pop up asking, "Do you want to run the Command Prompt as with administrative permission?" Approve this action by saying, "Yes".
sfc /scannow
Method 5: Fixing the Noise.dll Error by Manually Updating Windows
Most of the time, softwares have been programmed to use the most recent dll files. If your operating system is not updated, these files cannot be provided and dll errors appear. So, we will try to solve the dll errors by updating the operating system.
Since the methods to update Windows versions are different from each other, we found it appropriate to prepare a separate article for each Windows version. You can get our update article that relates to your operating system version by using the links below.
Windows Update Guides
Most Seen Noise.dll Errors
The Noise.dll file being damaged or for any reason being deleted can cause softwares or Windows system tools (Windows Media Player, Paint, etc.) that use this file to produce an error. Below you can find a list of errors that can be received when the Noise.dll file is missing.
If you have come across one of these errors, you can download the Noise.dll file by clicking on the "Download" button on the top-left of this page. We explained to you how to use the file you'll download in the above sections of this writing. You can see the suggestions we gave on how to solve your problem by scrolling up on the page.
- "Noise.dll not found." error
- "The file Noise.dll is missing." error
- "Noise.dll access violation." error
- "Cannot register Noise.dll." error
- "Cannot find Noise.dll." error
- "This application failed to start because Noise.dll was not found. Re-installing the application may fix this problem." error